• Blog
  • SHOP STAMPIN' UP!
  • JOIN MY TEAM
  • Recipe Project
  • About
  • Contact
Menu

Painted Orange

Charlet Mallett • Paper Crafter • Designer • Stampin' Up! Independent Demonstrator
  • Blog
  • SHOP STAMPIN' UP!
  • JOIN MY TEAM
  • Recipe Project
  • About
  • Contact

Working craft room in Maine home - Studio Showcase

October 30, 2021

It’s been ages since I’ve posted and shared pictures of my studio. This room is my home office and also my craft room. It’s basically my happy place.

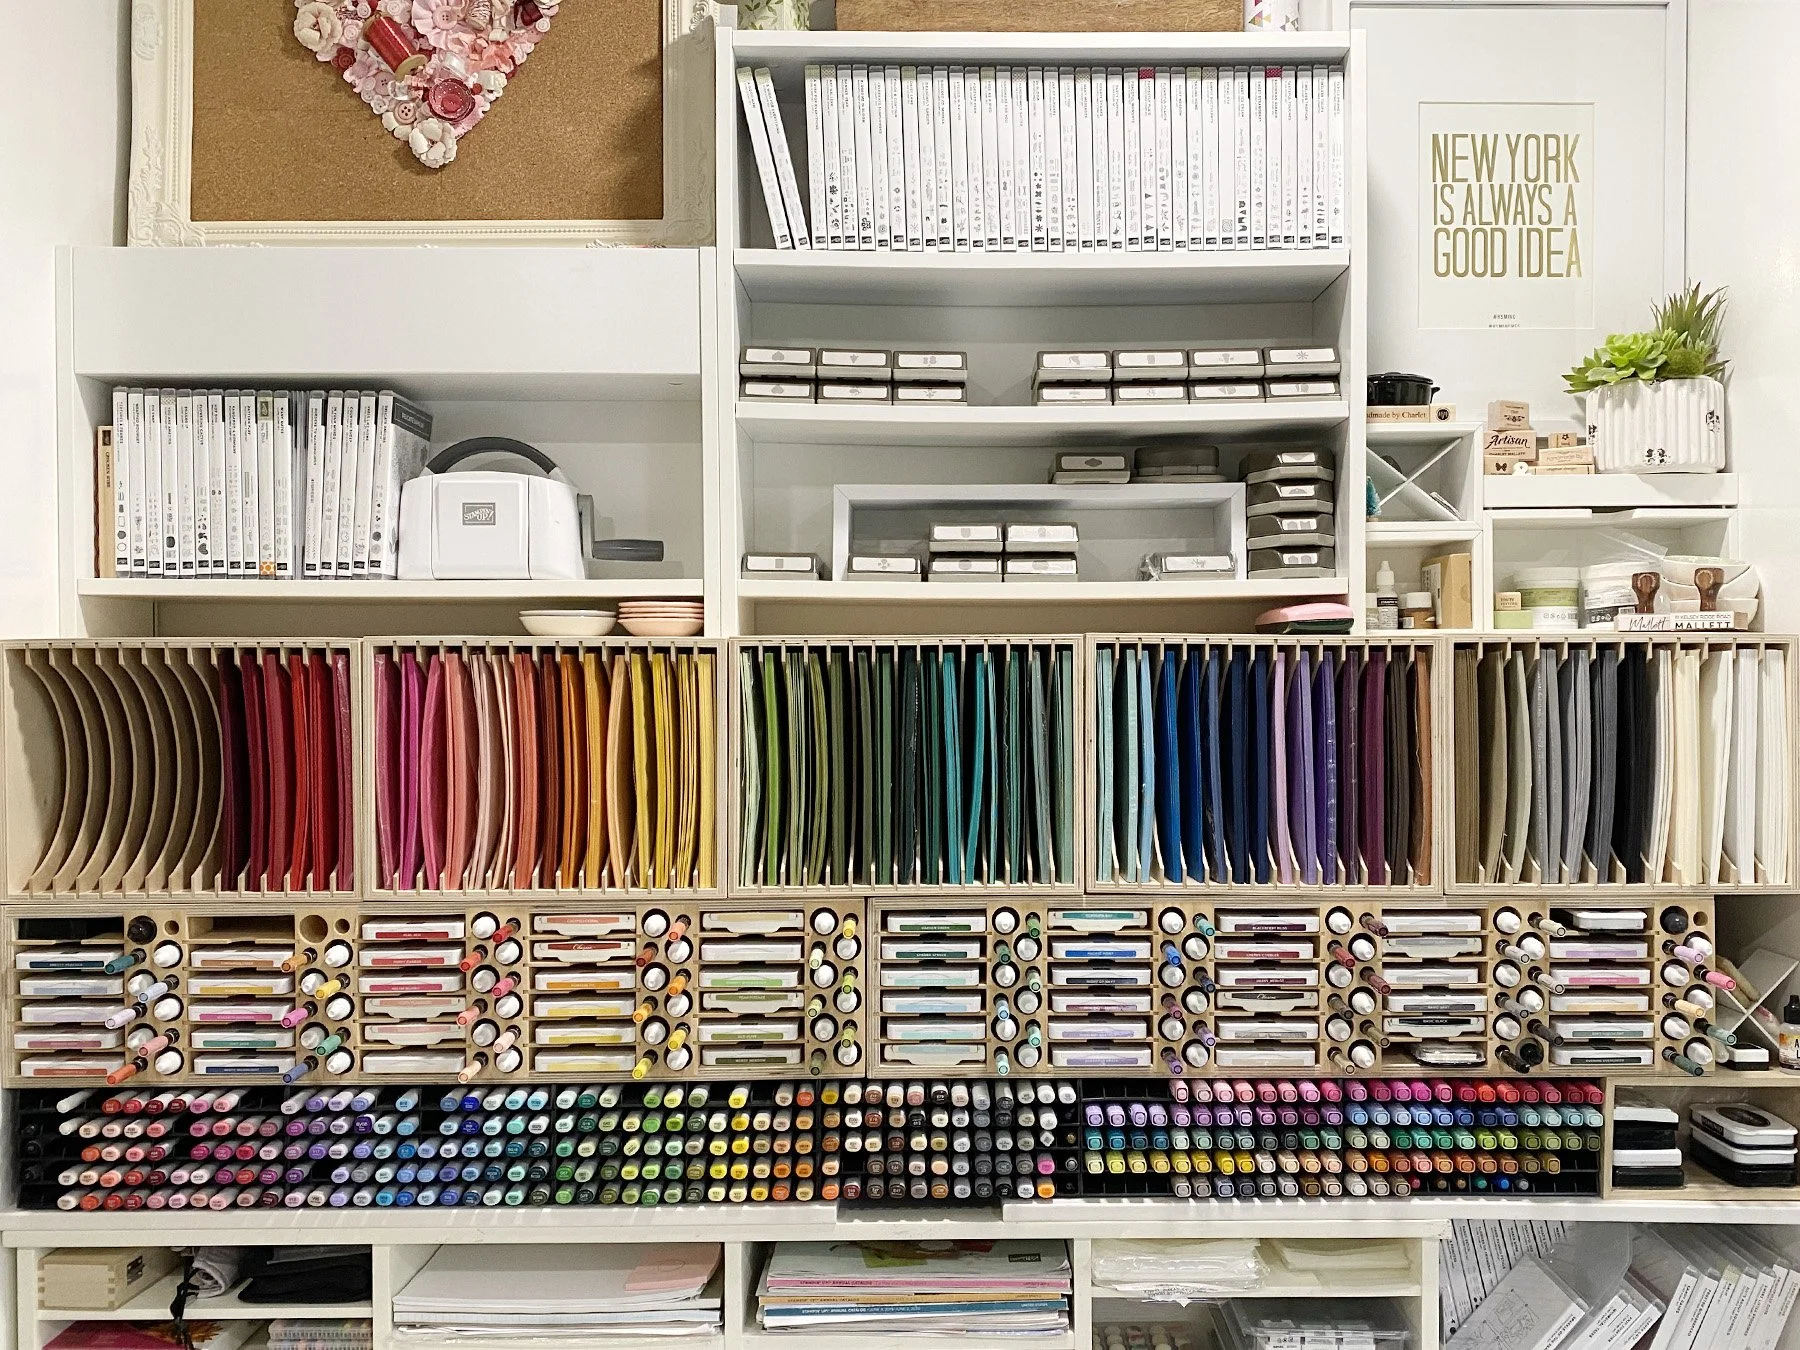
I recently added some paper storage to my space. I ordered these 8.5” x 11” storage units from Stamp n Storage. I love how they instantly organized my space. I created a REEL about this process and you can see it on my instagram @i.heart.stamps - I also snapped a few quick photos of the space and send them into Stamp n Storage to be entered into their Studio Showcase.

Guess what?!! I was selected as the September 2021 Stamp - n - Storage Studio Showcase winner. Yippee. I am super excited. You can read my interview and the article on the Stamp - n - Storage blog.

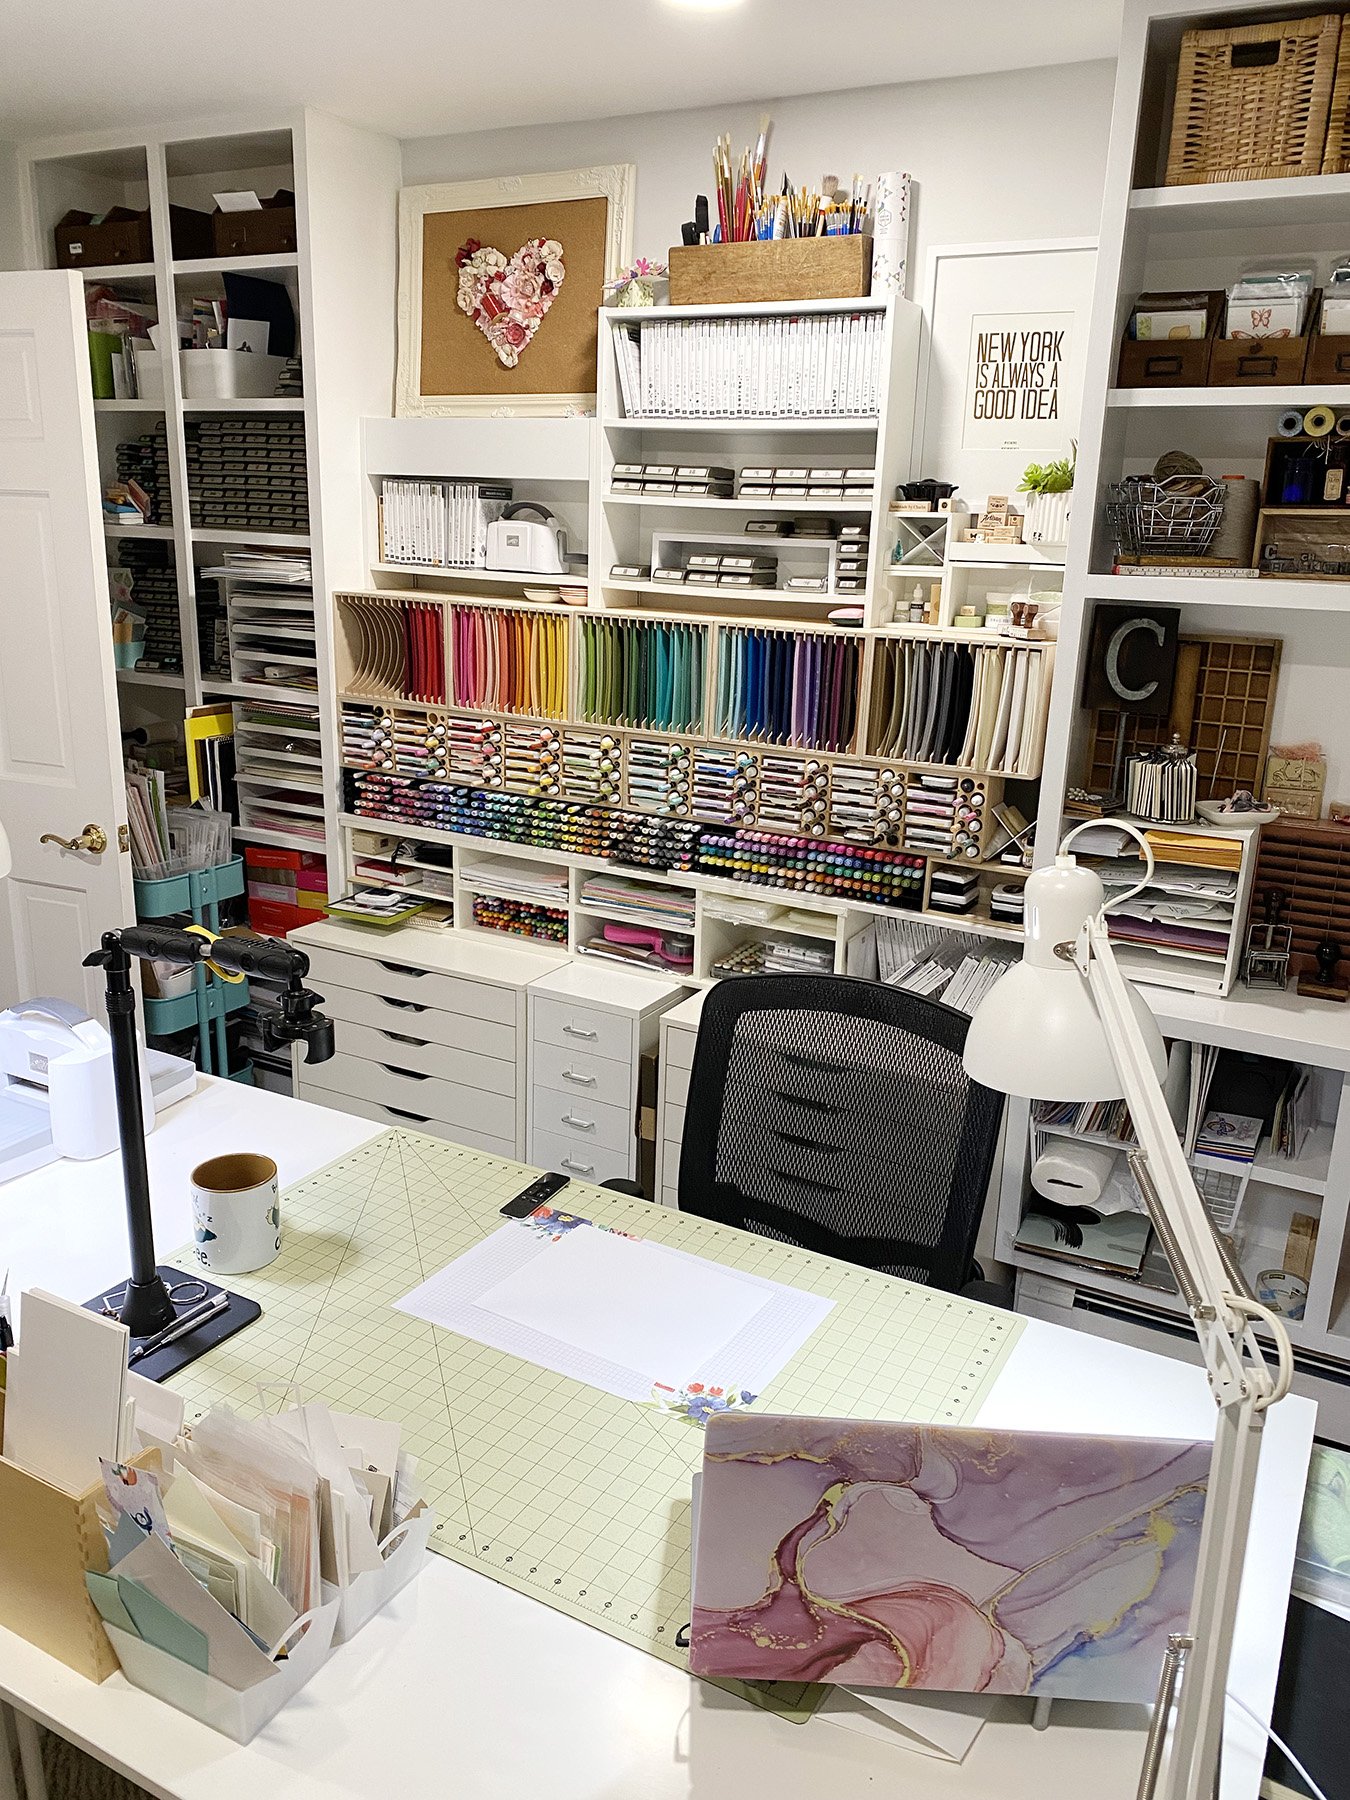
I figured it would be cool if I shared a few additional photos of my studio. My work space is always evolving as I tweak, purge and add to my craft stash. You can also see snippets of this room and previous rooms on instagram using the hashtag #charletscraftroom

During the day this studio serves as my office. I work at home as a freelance graphic designer. My desk is large enough that I have a clear space to use my laptop computer as well as areas that can hold the current craft project.

This room also has a TV, sewing machine, Brother Cut and Scan and other random tools. Those items are shown in various photos below.

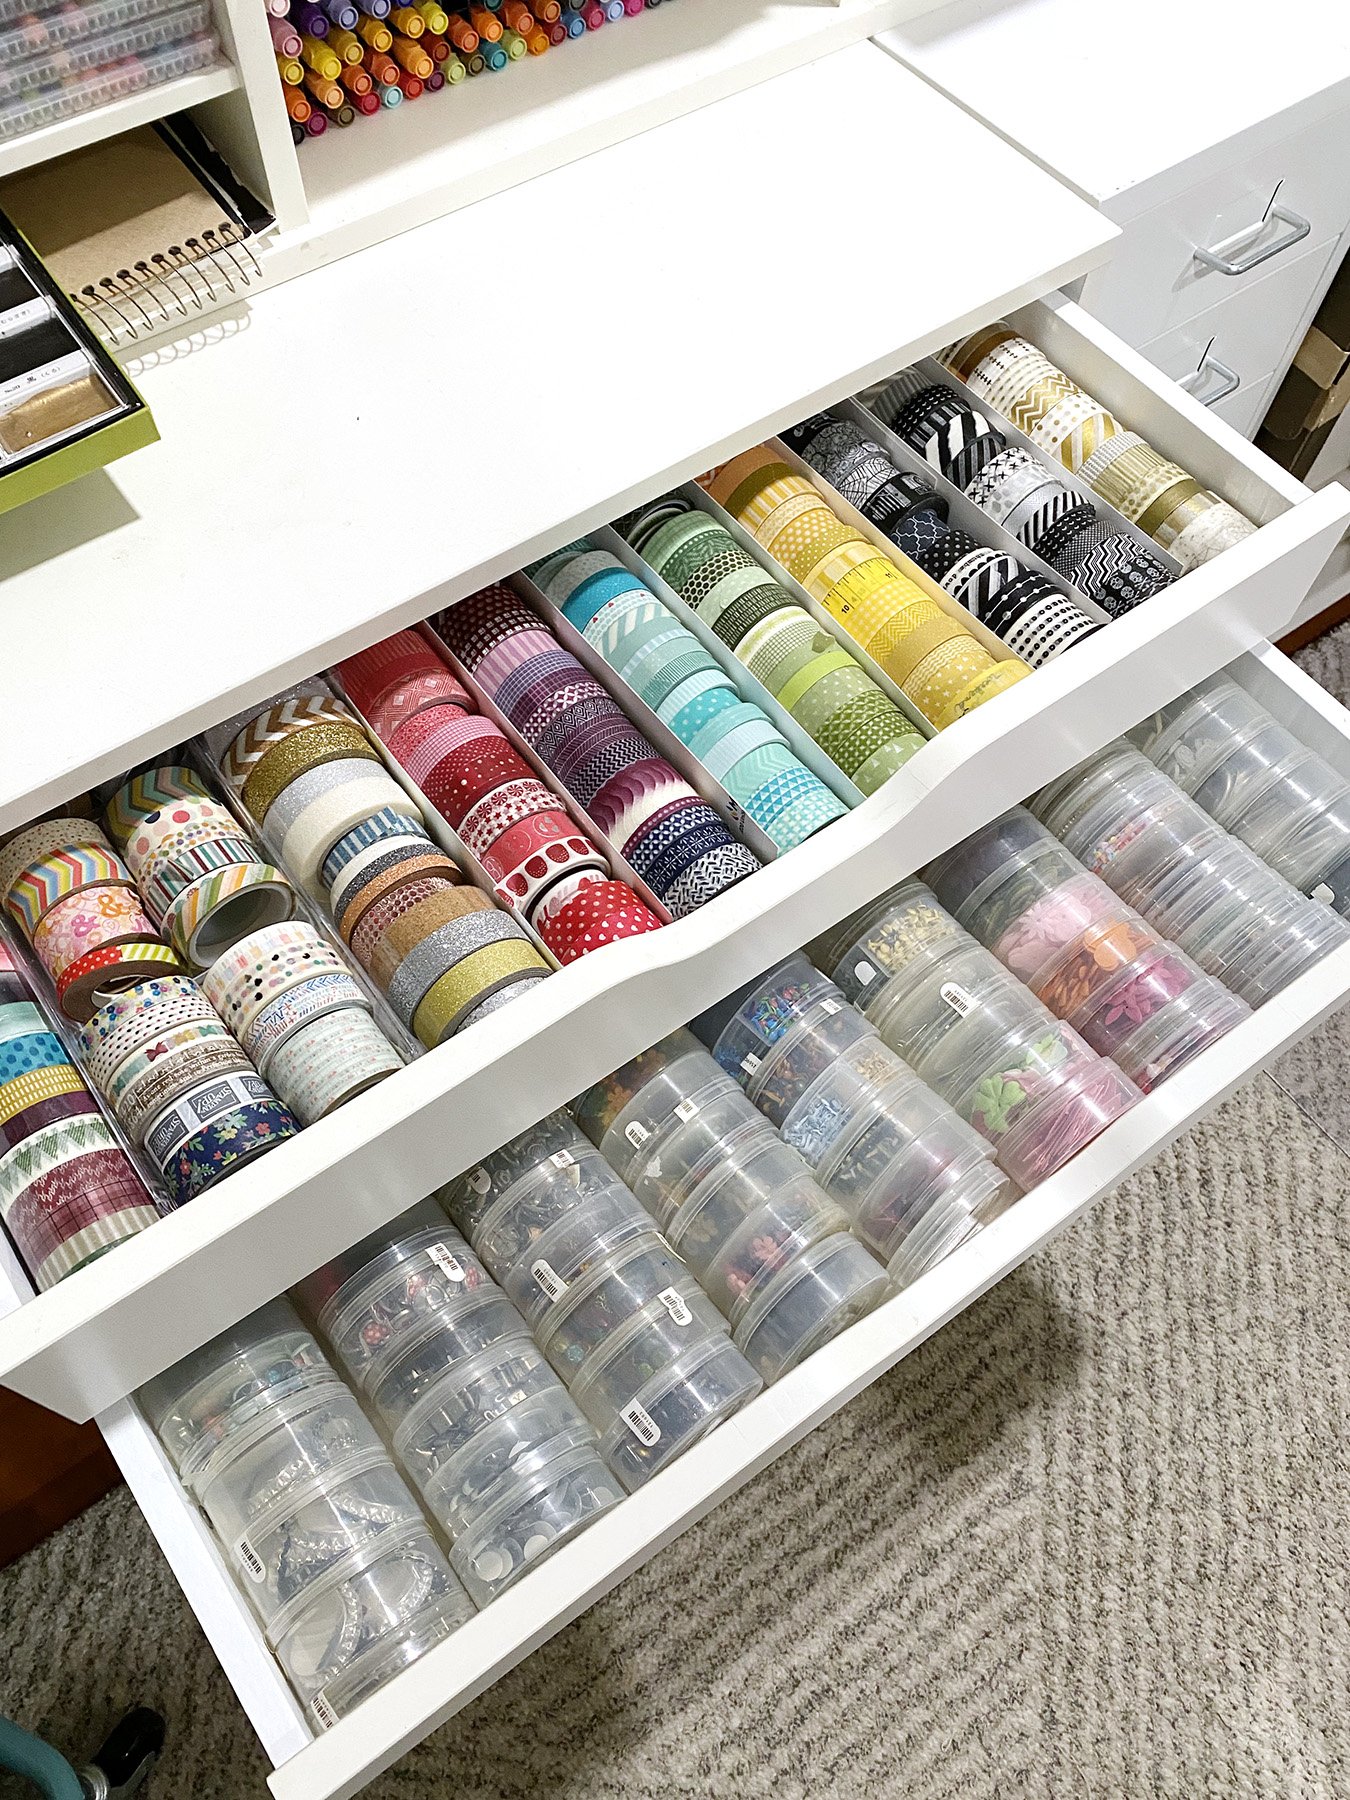
My studio has four few built-in book cases (one in each corner of the room). I added some storage units from Ikea. These drawers above are from IKEA - Alex Drawers . The drawers hold my ribbon and embellishments. The bottom three drawers are deeper and are perfect for SU ribbon spools. I have the ribbon lined up and I can easily pull one out when I want to use it.

I like keeping all the embellishments in the SU packaging / old plastic containers. I store these on their sides. You can see inside these containers easy enough. These fit in the top drawers perfectly. I keep these containers and put other embellishments in them when they are empty.

A couple folks have asked about the rug. I purchased this rug from Boutique Rugs. I love it and it’s held up nicely. It’s called the Horsley. Here is the link.

The photo above shows the fireplace that is in the room. So nice when it’s freezing in winter. On the right side of the photos is an antique postage organizer that I found at a local flea market. I use it to store my finished cards (organized by theme / occasion).

Here are a couple of photos of the built-in bookcases. I painted these white and use them to store and showcase all sort of mini collections. Some of the things I collect are: background stamps, flower frogs, antique ribbon spools, and antique office tools.

Thanks for taking a minute to enjoy this space with me. I appreciate all the DM and comments, it’s so wonderful when others share the same passion. Have a great day! Charlet

Tags Craft Room, Craft Storage, Storage, organizing, color organization
3 Comments
April 18 Instagram tip original.jpg

Organize your Stampin' Up! PAPER by COLOR!

April 18, 2018

Every year about this time I start the process of reorganizing my work space.  Out with the old and in with the new, right? While I don't purge as much as I should I am good about keeping current products organized and ready to go.

IMG_6291.jpg

I thought I'd show you the simply way I store my papers. I have decided after years and years of keeping them in Stampin' Up! color families that I prefer to store my colors in spectrum order.  I like the way this looks and I find it is more intuitive to the way I use my paper.  If I'm looking for a pink, all of my pinks are together. I use the job ticket method (I copied this from Jennifer McQuire), for all of my current colors.  I file away my retired colors alphabetically in labeled file folders. This way I still have them easily on hand for projects. And, you never know when a retired color might come back! I'm happy to pull a few old favorites back into rotation, hello Mint Macaron.

So here is my tip. Keep it EASY and don't reinvent the wheel! I use the Stampin' Up! catalog color pages to create my labels.  Basically print and cut. 

Three things I like about this method: 
1. The color names are already typed out and spelled correctly. TIME SAVER!
2. There is a visual color key that closely matches the cardstock. 
3. Once cut out, the labels are sized perfectly to adhere to Avery job tickets or in a standard file folder tab. 

So... there are a couple ways you can do this (I know this is hard to do right now as everyone doesn't have access). Stay with me...

1. Cut up your new catalog - GASP! I would never do this. J/K - I have been known to do this but usually at the end of a catalog year, not the beginning.

2. Make a color copy of your hard copy catalog color pages or print them from the online catalog PDF. This is my preferred method. The online copy is available to customers starting June 1. 

3. Download and print these handy graphics (provided to us from Stampin' up!). I really appreciate SU making this graphic available to us. I've set these graphics up on an 8.5 x 11 sheet for easy printing. Grab it here.

color-collections.jpg
 
in-colorsf08a801b0be1686086dbff0000ec372d.jpg
new-colors-2.jpg

SPEAKING OF NEW: ICYMI - here are the new colors that Stampin' UP! will be adding to their color collections. I seriously cannot wait to get my hands on these colors. Soft Sea Foam is screaming my name.

Tags Color, organizing, color organization
4 Comments
This blue and purple winter card uses tidbits from the Calm & Bright kit. I used the negative shape from the fir die cut to create a stencil and layered from there. Blend, stencil, stamp. Colors are Highlander Heather, Cloud Cover, & Lost Lagoon. @global_design_project #gdp525 #stampinup #calmandbright
Masking and stamping! On this card I mask with tape, blend ink, then stamp, then stencil, and stamp again to create a layered scene. It’s so satisfying to remove the masking tape… always a fun reveal. Card created for @global_design_project Stamp set is ‘Keeping Traditions’ Stencil is made from the negative die cut fir shape from the ‘Calm & Bright’ kit. #stampinup #cardmakingreels #cardmaker
Make Merry! I love pops of red and green with aqua for a holiday cards. Feel so fresh! 

I used the Keeping Traditions stamp set and leftover pieces from the Calm & Bright kit to create this card for #gdp524 - we are CASEing @herzundhandgemacht o
Make Merry! I love pops of red and green with aqua for a holiday cards. Feel so fresh! I used the Keeping Traditions stamp set and leftover pieces from the Calm & Bright kit to create this card for #gdp524 - we are CASEing @herzundhandgemacht over @global_design_project #stampinup #keepingtraditionstampset
Sending Joy! I created this wintry scene using the Calm and Bright card kit. I love the look of white on white. I pulled in some gold embossing and Crumb Cake to balance out all that white. This CAS kit has tons of cute and tiny elements (yippee for tiny stamps) that are perfect for creating an adorable little holiday scene. 166461 Card created for @global_design_project BRRR theme. #gdp523 #stampinup #cardmaker #cardmaking #cardmakersofinstagram #cardmakingreels #madewithmine
This blue and purple winter card uses tidbits from the Calm & Bright kit. I used the negative shape from the fir die cut to create a stencil and layered from there.  Blend, stencil, stamp. Colors are Highlander Heather, Cloud Cover, &  Lost L
Masking and stamping! On this card I mask with tape, blend ink, then stamp, then stencil, and stamp again to create a layered scene. It’s so satisfying to remove the masking tape… always a fun reveal. Card created for @global_design_proj
Make Merry! I love pops of red and green with aqua for a holiday cards. Feel so fresh! 

I used the Keeping Traditions stamp set and leftover pieces from the Calm & Bright kit to create this card for #gdp524 - we are CASEing @herzundhandgemacht o
Sending Joy! I created this wintry scene using the Calm and Bright  card kit. I love the look of white on white. I pulled in some gold embossing and Crumb Cake to balance out all that white. This CAS kit has tons of cute and tiny elements (yippee for

All Stampin’ Up! images are copyright © 1990-2025 Stampin' Up!

Posts prior to 2013 can be found on charletswebsite

PAPER PUMPKIN  - SUBSCRIBE!

PAPER PUMPKIN - SUBSCRIBE!

Featured
IMG_2476.jpg
Sep 24, 2025
Halloween INSPO
Sep 24, 2025
Read More →
Sep 24, 2025
CraftRoulette-contribution-276.jpg
Jul 18, 2025
Craft Roulette! - Guest July 18th
Jul 18, 2025
Read More →
Jul 18, 2025
IMG_3118 6x6.jpg
Feb 20, 2025
I love you more than ... French Fries!
Feb 20, 2025
Read More →
Feb 20, 2025
Blog_Badge.jpg

Subscribe

Sign up with your email address to receive news and updates.

We respect your privacy.

Thank you!
Only Available at Scrapbook.com!
EVO Synthtic Paper

Powered by Squarespace